Baking Along with Bookish Friends
Inspired by all of the cookbooks she discovered at the annual PNBA fall tradeshow, a bookselling colleague recently started an online bake-along. Book links in this post will take you to the bookstore where she works (SV Cascadia receives no compensation from these links. I just like to spread the indie bookstore love). We bake something from each category (pies, cakes, pastries, breads, etc), one recipe at a time, and share notes and photos in a private Facebook group. One member selects a category, then nominates someone else to choose a recipe. Skill levels and available kitchen space/equipment vary from former professionals to armchair bakers who can't get enough of the Great British Bake-Off.
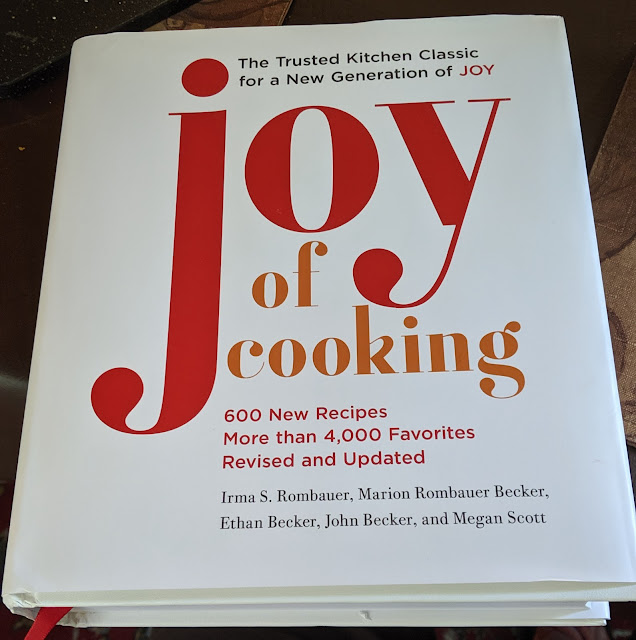
The first book selected was a new, updated edition of The Joy of Cooking (11/12/19, Scribner, $40). I know that many people hold this book as sacred, but I have never liked it. However, I could not pass up the opportunity to bake along with fellow cookbook nerds. I last tried a recipe from Joy about 20 years ago, so I thought I should probably give it a new look. Another bookseller friend passed along her copy when I mentioned this bake-along project, knowing I would use it more than she would. Thanks Annie!
 |
| The new edition |
The original author's great-grandson and his wife have revised and updated the classic tome with 600 new recipes. As with any classic book, I'm sure many people will turn up their noses and insist that the old one is just fine, thank-you-very-much. But this one will likely appeal to a new generation of cooks who have access to a broad spectrum of ingredients and techniques. True to the original, it has only line drawings, no flashy color photos.
Yes, there have been many editions of this book over the years, but this one promises extensive revisions and updates. This is not your grandmother's Joy of Cooking, but it might be the one for a recent graduate setting up a kitchen for the first time. It features a wider format (similar to Mark Bittman's How to Cook Everything) and a lay-flat binding. All cookbooks should be bound this way. Pages should not turn uninvited! (My copy had a comb binding, which was one of the least useful kitchen book bindings. Pages started falling out after only a couple uses. - Wayne)
The First Bake
Our organizer/instigator chose Soft and Chewy Sugar Cookies (page 768) for our first bake, and I was happy to see her immediately go off-book by adding ginger and extra lemon zest. This freed me to play a bit, so I added cardamom, cloves, ginger, lemon zest, and Thai tea to mine. The basic recipe resulted in a good texture: crunchy on the outside, chewy on the inside. Sugar cookies aren't my favorite, but I liked these and might make them again and play with the flavors. It's a solid base recipe that could be tweaked in myriad ways.
 |
| Sugar cookies with Thai tea glaze |
I was appointed to select our second recipe from the Breads and Coffee Cakes chapter. I looked for a traditional streusel-topped sour cream coffee cake, but I didn't see one. I considered Danish pastries (listed in the coffee cake section, but the method is in the pastries chapter) but decided to choose something more accessible to those of us who might not want to spend all day making a laminated yeast dough. I settled on English Muffins (page 621) because I have always wanted to try making them and the recipe looked straightforward.
I have read through at a lot of English Muffin recipes, but they always seemed a bit fussy and involved. If you know me (maker of marshmallows, eclairs, homemade pizzas, and plenty of multi-stage, all-day baking projects), me calling something fussy is ridiculous.
English Muffins are Easy!
I was shocked by the simplicity of this recipe. If you can make pancakes, you can make English muffins. They require a little more forethought and cooking time, but the basic steps are simple enough for kids to do. You can make the dough the night before and let it rise in the fridge, or make it first thing in the morning and let it rise on the counter for an hour while you drink your coffee, go for a run, or walk the dog. Each pan of muffins takes about 15 minutes to cook (low and slow is the key here), so start them before you scramble your eggs.
The recipe says it makes about twenty 3-inch muffins. This is accurate, but I would make them larger next time. I cooked half of my muffins the same night I made the batter and half the next morning after about 12 hours in the fridge. The first batch with the cold dough didn't rise as much, but subsequent batches came out just like the ones I baked the night before. The dough was also less sticky in the morning, making it easier to shape.
This is my modified version of the recipe. Ingredients and amounts are the same as in the book except for the cornmeal. The book calls for coarse cornmeal, but I only had fine on hand, so I used that. A medium grind would be ideal; I find coarse cornmeal to be a bit hard on the teeth. The fine ground meal was a little floury, but I didn't mind. So use whatever you have.
English Muffins
2 3/4 cups all-purpose flour
3/4 cup whole wheat flour
2 Tablespoons sugar
2 teaspoons salt
2 1/4 teaspoons (1 envelope) active dry yeast
2 cups lukewarm buttermilk (80-90 degrees F, or close to body temperature)
3 Tablespoons butter, melted
1 cup cornmeal (whatever coarseness you prefer/have on hand)
Mix both of the flours, sugar, salt, and yeast together in a large bowl. Mix the buttermilk and butter together in a separate bowl. Stir the wet ingredients into the dry ingredients until everything is incorporated. It will be very sticky.
 |
| I was very skeptical after mixing the dough. So sticky! |
When you're ready to cook, spread the cornmeal on a baking sheet. Scoop the dough onto the baking sheet 1/3 cup at a time (roughly golf ball sized) if you want 20 small muffins (I'm going to make mine larger and shoot for a dozen next time). Flip the dough balls over to coat both sides with cornmeal, then encourage them into a rounded shape. Fresh dough will be very sticky, so just do your best. Squash them flat with your hands. The dough will not spread in the pan, so this is the shape of your muffins. Mine started at about 1/4-inch thick and rose to about 1/2-inch.
 |
| Uncooked muffins with a cooked one (right) for comparison. |
If your dough was cold, let the shaped muffins sit for 15-30 minutes to warm up a bit before you cook them.
Heat a cast iron skillet or griddle over low to medium-low heat (I used a gas stove and found that medium-low was too hot). Place as many of the English muffins as will fit comfortably in the pan and cook for 5 minutes. The heat should be so low that there is no browning during this step. After 5 minutes, turn the heat up slightly (I went from low to medium-low), just enough to encourage browning, and flip the muffins. Cook for another 5 minutes. When the first side has browned, flip again and cook for another 5 minutes, or until browned on both sides. The slow cooking process allows them to rise and expand and make those awesome nooks and crannies.
 |
| Why don't we have smell-o-vision yet? |
Turn the heat back down and let the pan cool for 5 minutes in between batches.
To split, perforate the edges with a fork all the way around the edge, then pry them apart. Or slice them half horizontally with a knife if that sounds tedious.
Toast, then slather in butter and your preferred topping.
 |
| Homemade English muffins with butter and cherry jam |


Comments
Post a Comment